

Skateboarding is more than just a hobby or an activity—it's a culture, and a big of part of that culture is self-expression through art. Skaters have a near-infinite ability to customize their board art to suit their style, with thousands of color, pattern, print, and grip tape options.
In the spirit of self-expression, the Tony Hawk #SkateJamContest invites you to design your own skateboard deck art using any Creative Cloud tool. Once you've done that, you can go even further and bring your deck design to life in a full 3D visualization using Adobe Dimension CC. Even if you've never tried 3D, Dimension makes it easy.
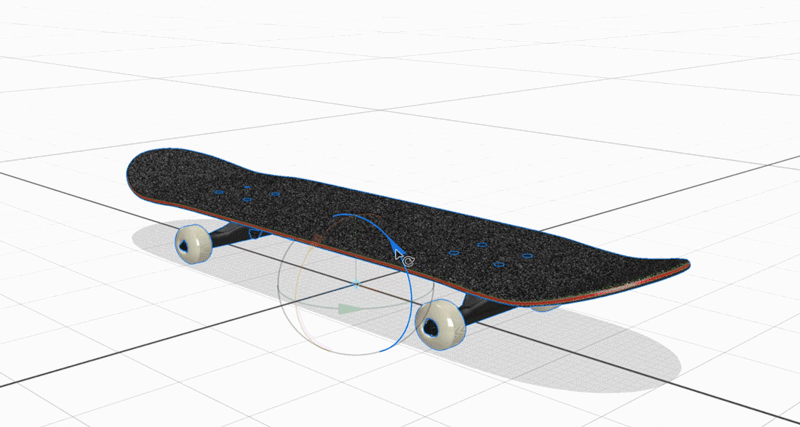
STEP 1: DOWNLOAD THE 3D SKATEBOARD
To get started with this Dimension tutorial, you’ll need to do three things:
- Create a 2D skateboard deck design (here's one way to do it in Adobe Illustrator CC).
- Download the free 3D skateboard from Adobe Stock.
- Download Adobe Dimension CC from Creative Cloud.
STEP 2: STAGE THE SKATEBOARD IN 3D
Think of Dimension as a virtual photo studio. You can bring in objects and position them, stage cameras and lighting, and export the result as an image. Once you've opened Dimension, go to File > Import 3D Model and import the skateboard you downloaded in Step 1.
One of the most enjoyable parts of working in 3D is being able to arrange objects any way you’d like. Use the Move (V) and Rotate (R) tools to position your deck in space. To snap it to the virtual floor, try the Move Object to Ground command (Cmd+./Ctrl+.) You can position your virtual camera in 3D using the Orbit (1), Pan (2), and Dolly (3) tools.
STEP 3: CUSTOMIZE YOUR SKATEBOARD
You can apply materials to different areas of the skateboard. Want to try chrome on the undercarriage? Use the “Starter Assets” material library provided in Dimension and just drag and drop materials onto parts of your skateboard. After adding a material, double-click the surface of the object to access the material properties and change color or choose whether it’s matte, glossy, or even metallic.
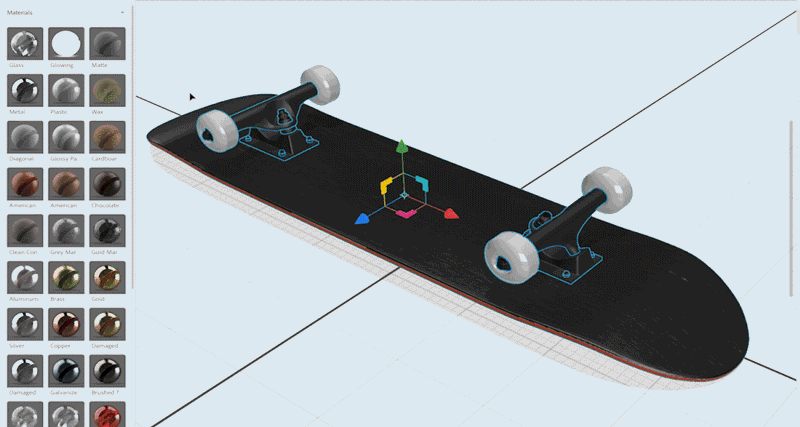
To add the deck design you created, you can either drag and drop it directly into the canvas, or you can select the model and go to File > Import > Place Graphic on Model. Your design will apply to the part of the skateboard you have selected, and you can then use the on-screen handles to move, rotate, and scale the design into position. (This can be done for a full-deck design or individual images as layers.)
Please setup this component
STEP 4: ADD A BACKGROUND
You can control the background of your scene, too. Select Environment in the Scene panel and then, in the Properties panel, change the background to either a color or an image.
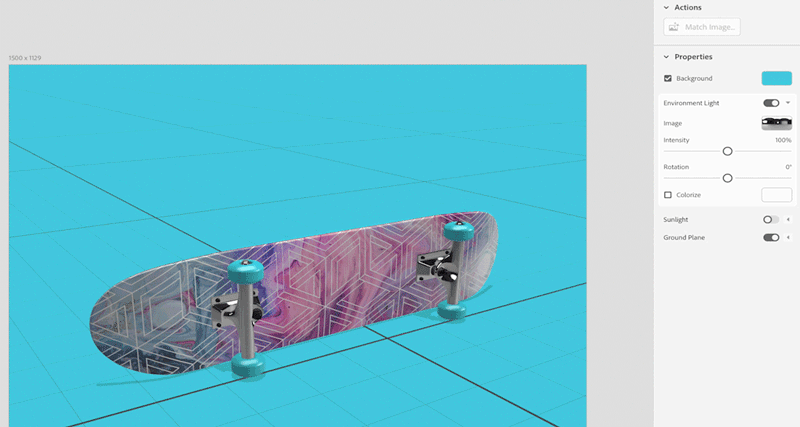
If you use a photographic background, Dimension can automatically match your virtual world to the photo, including your camera perspective, general environment lighting, and sunlight.
STEP 5: RENDER
You can export your image in 3D by rendering it—just go to to Render Mode and choose your render settings. Dimension will generate a photorealistic finished image. If you'd like, you can take the rendered image into Adobe Photoshop CC for editing, compositing, and more fun. Or share it immediately on Twitter or Instagram with the hashtag #SkateJameContest.

By designing with 3D, as you've just done, you're able to express your ideas in a photorealistic way with ease, which can showcase your design intent in an effective way. To learn more about using Dimension, check out our starter video tutorial series.
February 12, 2019


